Why Your Plaster Cracks and When to Call a Plasterer
Discover why plaster walls and ceilings crack in Australian homes. Learn the difference between cosmetic hairline cracks and structural red flags, repair costs, and trade licensing.
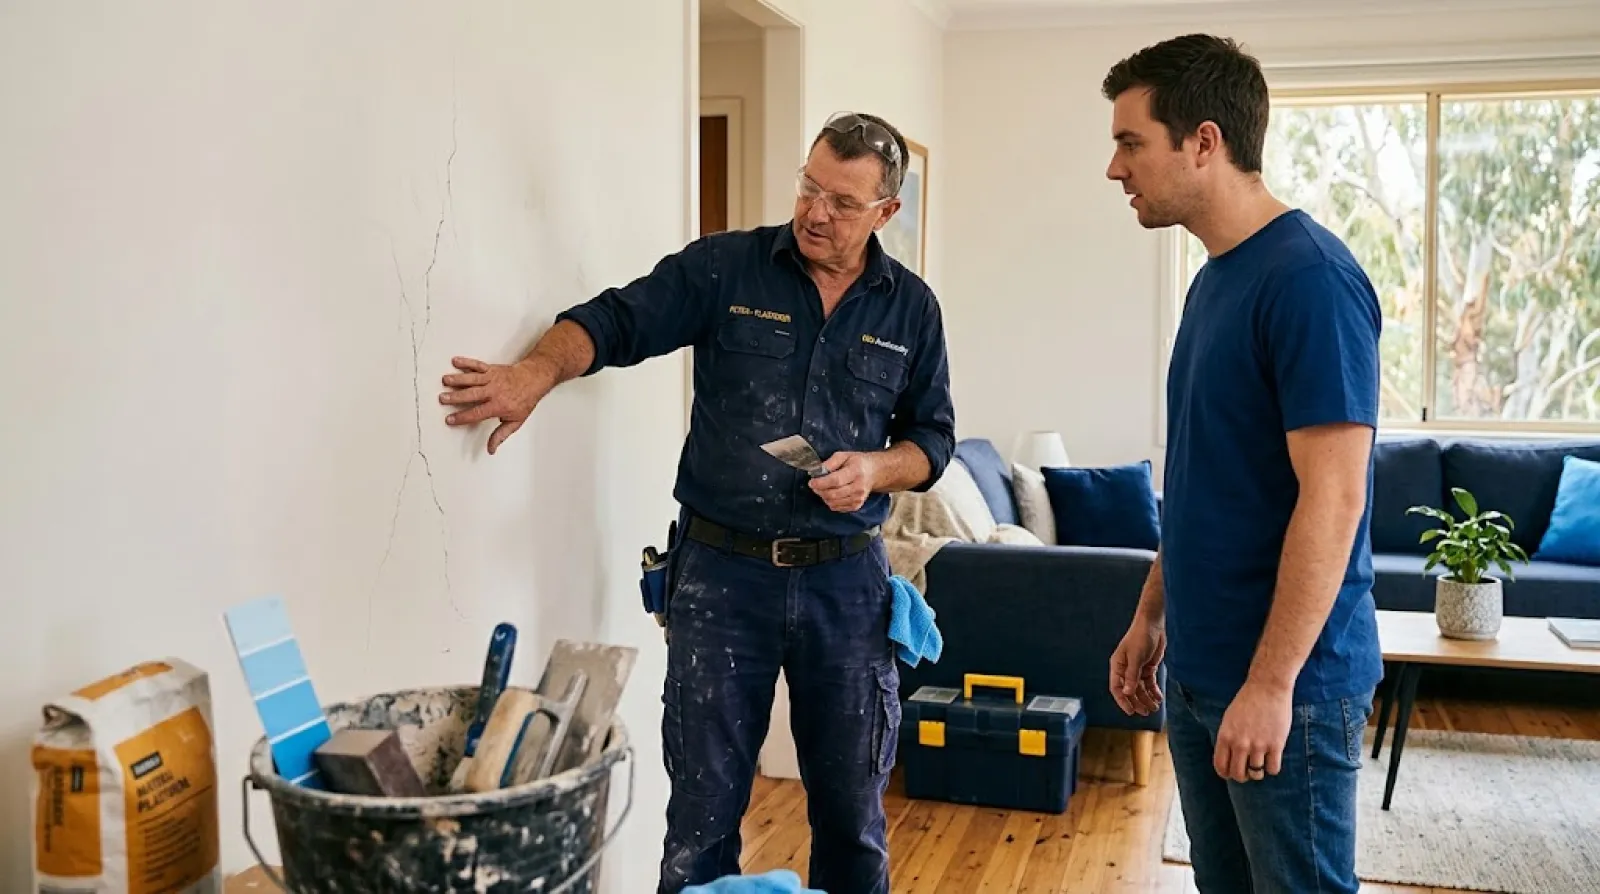
Discovering a fine hairline crack running down your hallway wall or noticing a gap opening along your ceiling cornice can be unnerving for any Australian homeowner or property manager. Plaster surfaces—whether modern paper-faced plasterboard or traditional solid plaster—are the finished skin of your home. Because plaster is rigid, it acts as a immediate indicator of subtle shifts, temperature fluctuations, moisture variations, and structural stress occurring within the building envelope.
While many plaster cracks are purely cosmetic consequences of natural timber frame shrinkage or minor seasonal soil movement, others signal active structural settlement or hidden water leaks requiring prompt professional intervention. Distinguishing between a harmless surface defect and an urgent structural warning sign is essential to protecting your property’s value, safety, and liveability.
This practical guide explores the primary causes of plaster cracking in Australian residential properties, explains relevant Australian Standards such as AS/NZS 2589:2017, outlines typical repair costs, details state-by-state licensing requirements, and provides actionable steps on when you can safely perform a simple repair versus when you should hire a qualified local tradesperson.
Understanding Plaster Systems in Australian Homes
To understand why plaster cracks, it helps to identify the specific plaster system installed in your property, as older heritage homes and modern project builds respond differently to environmental stress.
Modern Gypsum Plasterboard (Drywall)
In most Australian homes constructed from the 1970s onward, interior walls and ceilings are lined with factory-manufactured plasterboard sheets (commonly referred to by the brand name Gyprock). These sheets consist of an inner gypsum core encased in heavy-duty liner paper. Plasterboard is fixed directly to timber or cold-formed steel framing studs, and the joins between sheets are bridged with paper or fiberglass reinforcing tape and layered with jointing compound before being sanded smooth.
Under AS/NZS 2589:2017 (Gypsum linings – Application and finishing), internal plasterboard installations are classified by levels of finish:
-
Level 3: Used in unlit storage areas or garage walls where appearance is secondary.
-
Level 4: The standard baseline finish for residential home construction, suitable for low-sheen or flat paint finishes under normal ambient lighting.
-
Level 5: The highest finish quality, involving a full skim coat over the entire board surface to eliminate texture variations, specified for areas exposed to critical glancing light (such as large floor-to-ceiling windows, skylights, or dark feature wall paints).
Solid Plastering and Lath-and-Plaster
In heritage dwellings—such as Victorian terraces, Edwardian cottages, or Federation and Interwar bungalows found across older suburbs in Sydney, Melbourne, and Adelaide—walls and ceilings often feature solid plaster.
-
Masonry Substrates: Hard plaster or rendered mortar applied directly over internal double-brick or clay block walls.
-
Lath-and-Plaster Ceilings: Lime and horsehair plaster pressed through thin, horizontal wooden strips (laths) attached to ceiling joists. Over time, the plaster "keys" (the nibs that squeeze behind the laths to hold the plaster in place) can snap due to building movement or vibration, causing the plaster ceiling to delaminate, crack, and sag dangerously.
The Primary Causes of Plaster Cracking in Australia
Australia’s extreme climate, distinct soil types, and timber construction methods contribute heavily to internal lining stress. Knowing what causes these cracks helps you address the root issue rather than repeatedly patching the same area.
1. Soil Movement and Foundation Settlement
Australia contains vast expanses of highly reactive clay soils (classified as Class M, H1, H2, or E under AS 2870:2011Residential Slabs and Footings). These soils expand significantly when absorbing rainwater and contract during prolonged dry spells.
During extended drought conditions or intense heatwaves, reactive clay dries out and shrinks, causing slab edges or strip footings to sink slightly. Conversely, during periods of heavy rain or La Niña weather events, clay soils swell, lifting sections of the foundation. This phenomenon—known as foundation movement or ground heave—twists the structural frame above, putting tensile stress on rigid internal wall and ceiling linings and creating diagonal or stepped plaster cracks.
2. Timber Framing Shrinkage and Drying
New homes and recently completed home extensions frequently experience cosmetic cracking within the first 12 to 24 months. Australian timber framing (typically plantation radiata pine or engineered timber) retains residual moisture from manufacturing and construction. As the timber gradually seasons and dries out inside a newly climate-controlled, closed house, individual frame members warp, twist, and shrink slightly.
Because plasterboard sheets are rigidly screwed or nailed to these studs, timber frame movement pulls at sheet joins, producing straight vertical or horizontal hairline cracks along wall seams and ceiling corners.
3. Thermal Expansion and Contraction
Internal building materials expand when heated and contract when cooled. In regions with substantial diurnal temperature swings (such as Canberra, western Sydney, inland Victoria, and regional Australia), roof spaces can reach temperatures above 50°C in summer before cooling rapidly at night.
Ceiling joists expand and contract at different rates than the plasterboard attached beneath them. Without adequate expansion joints (which are recommended under AS/NZS 2589:2017 for continuous wall or ceiling runs exceeding 12 metres), thermal movement shears jointing compound and causes straight cracks to open along continuous joints or cornice interfaces.
4. Moisture Damage and Hidden Leaks
Water ingress is one of the most destructive causes of plaster distress. A leaking roof tile, rusted box gutter, faulty waterproofing membrane in a upper-floor bathroom, or pinhole plumbing leak behind a wall will quickly compromise plaster linings.
Gypsum is highly porous; when exposed to water, it loses its structural integrity, swells, turns soft or spongy, and discolours. As the wet plaster expands and breaks down, surface paint blisters, jointing tape peels away, and wide, jagged cracks develop around the water-saturated zone.
5. Workmanship and Installation Faults
Not all plaster cracks stem from structural or environmental forces; poor installation techniques frequently lead to early failure:
-
Omission of Paper Reinforcing Tape: Skipping joint tape or using inappropriate mesh tape in high-stress internal corners.
-
Incorrect Fastener Spacing: Placing screws too close to sheet edges or sinking screw heads too deep, which punctures the paper face and destroys the fastener's holding power.
-
Incorrect Compound Mixing or Application: Applying topping coats before base coats have fully dried, or failing to clean dust from framing prior to adhesive application (causing stud adhesive to detach).
-
Butt-Joint Placement over Openings: Placing sheet joins directly aligned with the upper corners of door or window frames, which concentrates structural stress precisely where building movement naturally occurs.
How to Assess Your Plaster Cracks: Cosmetic vs Structural
When inspecting wall or ceiling cracks, evaluate their width, orientation, location, and associated signs of building movement. Use the classification system below to gauge severity.
Cosmetic Cracks (Minor – Under 1 mm Wide)
-
Appearance: Fine, hair-like lines running vertically or horizontally along sheet joins or flat internal corners.
-
Location: Common along ceiling cornices, around window architraves, or along internal partition wall joints.
-
Characteristics: The plaster wall remains completely flat when pressed, and adjacent doors or windows open and close smoothly without sticking.
-
Verdict: Generally harmless. Caused by normal house settling, minor humidity shifts, or timber frame drying. Can be filled and repainted during routine home maintenance.
Moderate Cracks (1 mm to 5 mm Wide)
-
Appearance: Noticeable gaps radiating diagonally upward from top corners of door frames, window openings, or staircase voids.
-
Location: High-stress load paths across internal load-bearing walls and ceiling spans.
-
Characteristics: Cracks may reopen shortly after being patched and repainted.
-
Verdict: Indicates ongoing seasonal soil movement or frame flexing. Should be monitored over 3 to 6 months. If crack width remains stable, a professional can re-tape and flex-seal the joint using professional-grade compound systems.
Severe Structural Cracks (Over 5 mm Wide)
-
Appearance: Wide, jagged, or stepped cracks that extend through both internal plasterboard/render and external brickwork or concrete footings.
-
Associated Red Flags:
-
Doors and windows sticking, jamming, or refusing to latch shut.
-
Visible sagging, bulging, or rippling in ceiling linings.
-
Noticeable sloping or bounce in timber floors.
-
A distinct popping noise or visible separation between walls and ceilings or floors.
-
Plaster dust or small debris continuously falling from cracking ceilings.
-
-
Verdict: Potential structural compromise or active foundation movement. Requires immediate inspection by a registered structural engineer or licensed builder before carrying out cosmetic plaster repairs.
DIY Patching vs When to Call a Plasterer
Attempting to repair complex plaster issues without professional trade skills often results in unsightly bulging seams, visible sanding marks, or cracks that return within weeks.
When You Can DIY
Simple surface repairs can be handled by confident homeowners using basic supplies from a local hardware store:
-
Filling minor surface nail pops or shallow screw head impressions.
-
Repairing small pinholes, scuffs, or minor hairline cosmetic cracks under 1 mm in non-critical lighting areas.
-
Patching tiny wall dents caused by door handles or furniture bumps using a self-adhesive mesh patch and multi-purpose topping compound.
When to Call a Professional Plasterer
Engaging a skilled trade professional is necessary in the following situations:
-
Ceiling Cracks with Visible Bulging or Sagging: A sagging ceiling indicates that fasteners or plaster keys have failed. Unattended sagging ceilings pose a collapse hazard.
-
Cracks Broader Than 2 mm or Spanning Long Distances: Large cracks require structural joint re-strapping, mechanical cutting of the gap, paper tape re-embedding, and multiple feathered compound coats to match surrounding wall planes.
-
Water-Damaged or Mould-Affected Plaster: Damaged plaster must be cut back to clean framing timber, treated for internal moisture, re-framed, and replaced with moisture-resistant plasterboard (such as green-board or wet-area gypsum linings).
-
Heritage Lath-and-Plaster Restoration: Restoring original horsehair and lime plaster walls requires specialized skills, traditional lime coats, or careful under-ceiling batten installation to preserve period features.
-
Achieving a Seamless Finish under Critical Lighting: If your room features large north-facing floor-to-ceiling glass, highlights, or downlights, achieving an invisible repair requires a Level 5 finish from an experienced trade professional.
To hire a qualified specialist for wall, ceiling, or decorative plaster repairs, search for a certified Plasterer in Australia through trusted local trade directories.
Australian Licensing, Building Codes, and Standards
In Australia, plastering and internal wall lining installation must comply with strict building standards and state consumer protection laws.
Governing Standards
-
AS/NZS 2589:2017 (Gypsum linings – Application and finishing): Sets mandatory national standards for framing tolerances, fastener patterns, jointing systems, dry times, ambient temperature conditions during installation, and surface levels of finish.
-
National Construction Code (NCC): Governs fire-resistance ratings (using fire-rated plasterboard systems like Fyreguard) and acoustic performance requirements (Acoustic-rated plasterboard linings) between attached dwellings, townhouses, and apartment tenancies.
State-by-State Trade Licensing
Plastering licensing thresholds vary across Australian states and territories:
-
New South Wales (NSW): Under the Home Building Act 1989, any wall lining, dry plastering, or solid plastering work valued at more than $5,000 (including labour and materials) must be conducted by a tradesperson holding a valid Plastering or Drywall Trade Licence issued by NSW Fair Trading.
-
Queensland (QLD): Under the Queensland Building and Construction Commission Act 1991, trade contractor licensing is strictly regulated. Plastering work exceeding $3,300 in value requires a contractor licence issued by the Queensland Building and Construction Commission (QBCC).
-
Victoria (VIC): Regulated by the Victorian Building Authority (VBA). While minor patch repairs fall under trade maintenance, structural wall alterations, major plaster restorations, or domestic building projects valued at over $10,000 require a registered builder or appropriately registered specialist trade practitioner.
-
Western Australia (WA): Regulated by Building and Energy (Department of Mines, Industry Regulation and Safety). Registration is required for major building trade contracts exceeding $20,000.
-
South Australia (SA): Regulated by Consumer and Business Services (CBS). Anyone contracting for building work or specialised trade work must hold an active Building Work Contractor Licence.
Typical Australian Plastering and Repair Costs
Plastering repair costs depend on job complexity, room access, height, ceiling pitch, substrate material, and whether structural re-framing or water damage restoration is needed.
Hourly Rates vs Fixed Quotes
-
Hourly Rate: Average hourly rates for a qualified trade professional range from $45 to $90 per hour (+ GST) across Australia. Emergency call-outs or out-of-hours moisture remediation work will incur higher base rates.
-
Small Job / Call-Out Fee: Most licensed tradespeople charge a minimum service fee of $150 to $350 to cover site visitation, setup, material transit, and surface preparation time.
Cost Breakdown Table
| Service / Repair Type | Estimated Cost Range (AUD inc. GST) | Primary Cost Drivers |
|
Small Patch Repair (Holes under 150mm X 150mm) |
$150 – $350 fixed fee |
Minimum call-out fee, drying time between coats, travel. |
|
Cracked Wall Repair (Re-strapping & re-jointing 2-3m crack) |
$250 – $550 per wall |
Cutting back loose material, paper taping, 3-coat compound, sanding. |
|
Ceiling Crack & Cornice Repair (3-5m crack run) |
$350 – $800 |
Working at height, scaffold setup, cornice cement re-bonding. |
|
Sagging Ceiling Repair (Re-screwing joists & re-stopping) |
$600 – $1,500 per room |
Timber ceiling access, mechanical bracing, structural re-fastening. |
|
Plasterboard Wall Installation (Supply & Install) |
$20 – $35 per m² |
Standard 10 mm board, square stop or standard cornice, Level 4 finish. |
|
Plasterboard Ceiling Installation (Supply & Install) |
$25 – $40 per m² |
13 mm ceiling board, ceiling battens, insulation fitment. |
|
Wet Area Plasterboard (Moisture-resistant green board) |
$30 – $50 per m² |
Waterproofing integration, specialized moisture-resistant compounds. |
|
Solid Plastering / Render Repair (Heritage / Brick skin) |
$45 – $90 per m² |
Multi-coat float and set finish, specialized lime or acrylic render. |
Geographic and Regional Considerations Across Australia
Soil profiles, climate patterns, and heritage building styles vary across Australian capital cities and regional centres, directly influencing how plaster behaves:
Melbourne & Adelaide
Both Melbourne and Adelaide feature extensive suburban corridors built over highly reactive volcanic clay soils (such as Melbourne's northern and western suburbs, and the Adelaide plains). These areas undergo substantial soil expansion and contraction between dry summers and wet winters, making foundation settlement cracks common.
Furthermore, these cities boast extensive stocks of Victorian and Edwardian housing where ageing lath-and-plaster ceilings require skilled heritage maintenance. If you are restoring a period home, consult an experienced Solid Plasterer in Australia who understands traditional lime renders and float-and-set plaster application.
Brisbane & Coastal Queensland
Subtropical climatic conditions in Brisbane and coastal Queensland introduce high ambient humidity and heavy summer storm activity. Unsealed plasterboard absorbs elevated airborne moisture, causing paper liners to soften and expanding joints. High attic temperatures require ceiling linings to be secured with ceiling battens to prevent plaster sag over time.
Sydney Metropolitan Area
In Sydney, housing stock spans century-old sandstone and brick terraces in the inner-west to modern project homes across western Sydney's expansive clay plains. Rapid urban development combined with significant rainfall shifts makes proper expansion joint placement essential in modern multi-storey framing.
Perth Metropolitan Area
Unlike eastern state timber-frame traditions, Western Australian residential construction predominantly utilizes double-brick masonry. Internal walls feature a wet-applied cement render float coat topped with a fine gypsum coat (known as hard wall plaster or white set plaster). Cracks in Perth homes typically appear as fine line cracks through white set render caused by masonry shrinkage or lintel movement.
Practical Case Scenarios
To better understand how plaster issues unfold in everyday property management, consider these real-world Australian examples:
Scenario 1: Settling in a Western Sydney New Build
-
The Situation: A buyer built a double-storey project home in Sydney's western suburbs. 18 months after moving in, thin diagonal cracks appeared above the master bedroom door frame and along the top edge of the staircase wall.
-
The Cause: Timber frame drying combined with minor initial footing settlement on reactive clay soil.
-
The Solution: An inspection confirmed the footings had stabilized and crack widths remained under 1 mm. A trade specialist raked out the hairline cracks, applied paper jointing tape, topped the seam with three thin coats of joint compound, and feather-sanded the wall to a smooth Level 4 finish ready for repainting.
Scenario 2: Delaminating Lath-and-Plaster Ceiling in Inner Melbourne
-
The Situation: A homeowner living in a heritage Victorian terrace in Fitzroy noticed a wide, spreading crack across the lounge room ceiling, accompanied by a noticeable downward bulge in the centre of the room.
-
The Cause: Ageing timber laths had dried out, causing the original horsehair plaster keys holding the ceiling to snap under structural vibration.
-
The Solution: To preserve the original decorative plaster cornice, a specialist installer secured the sound ceiling sections from above using ceiling screws and plaster washers into installed joist battens. Damaged plaster sections were carefully removed and replaced with modern plasterboard spliced seamlessly into the period cornice line.
Scenario 3: Storm Roof Leak in a Brisbane Rental
-
The Situation: During a severe summer thunderstorm, blocked roof valley gutters overflowed into the ceiling cavity of a suburban rental property, causing water to pool over the hallway plasterboard ceiling.
-
The Cause: Moisture saturation weakened the gypsum core, causing severe ceiling sag and joint tape peeling.
-
The Solution: The landlord engaged a plumber to clear the gutter overflow first, followed by a plastering contractor who cut away the ruined plasterboard back to the centre of structural joists, installed new moisture-resistant board, sealed the edges, and applied a mold-inhibiting ceiling primer.
How to Choose the Right Local Plastering Professional
When selecting a trade contractor to repair wall or ceiling damage, follow these evaluation steps:
-
Verify Trade Licences and Registrations: Check that the tradesperson holds a current trade licence issued by your state authority (e.g., NSW Fair Trading, QBCC in QLD, or VBA in Victoria) for projects exceeding statutory monetary thresholds.
-
Confirm Public Liability Insurance: Ensure the contractor carries active Public Liability Insurance (typically a minimum of $10,000,000 policy cover) to protect your property against accidental damage during structural ceiling repairs or scaffolding work.
-
Request Itemised Written Quotes: Obtain detailed quotes breaking down material costs, surface preparation, scaffold/ladder access, compound drying times, trash removal, and GST.
-
Inquire About the Level of Finish: Confirm that the contractor will finish plasterboard repairs to AS/NZS 2589:2017 Level 4 standards (or Level 5 for walls exposed to critical glancing light).
-
Review Past Portfolios and Client Feedback: Examine before-and-after photos of recent patch work, cornicing, or full room re-sheets, and check verified local customer reviews.
Consumer Checklist for Plaster Wall & Ceiling Repairs
Use this quick checklist when managing plaster repairs in your home:
-
Inspect the Crack: Measure width, direction, and location. Check if adjacent doors or windows stick.
-
Rule Out Structural Hazards: Confirm there is no active roof leak, ceiling sag, or foundation drop before starting cosmetic repairs.
-
Check State Licensing Limits: Verify if the project cost exceeds your state's licensing threshold ($3,300 in QLD; $5,000 in NSW).
-
Confirm Insurance Coverage: Request a copy of the contractor's Public Liability Insurance certificate.
-
Ensure Compliant Materials: Confirm the use of paper reinforcing tape for high-stress joints rather than self-adhesive mesh tape alone.
-
Clarify Site Preparation & Clean-up: Ask if the trade quote includes dust protection sheets for furniture and full post-sanding site cleanup.
-
Inspect Before Painting: Review the finished plaster surface under flat and angled lighting once dry to ensure seamless blending.
Find Local Plastering Services and Australian Home Maintenance Information on AusLocaly
When dealing with cracked interior walls, sagging ceilings, water damage remediation, or period home plaster restorations, hiring an experienced local specialist ensures your repairs are durable, safe, and compliant with Australian building standards.
AusLocaly helps homeowners, renters, investors, and property managers find reliable local trade professionals and practical property maintenance information across major Australian metropolitan areas and regional centres.
Explore local services and trade categories near you:
-
Discover licensed trade contractors across popular AusLocaly Categories.
-
Find specialist trade services in Sydney, Melbourne, or Brisbane.
-
Compare local service providers, research trade licensing standards, and request quotes for wall repairs, solid plastering, Gyprock installations, and general home renovations.
Whether you need a quick patch repair for a rental inspection or a complete ceiling re-sheet for a period renovation, visit AusLocaly to connect with skilled trade services across Australia.